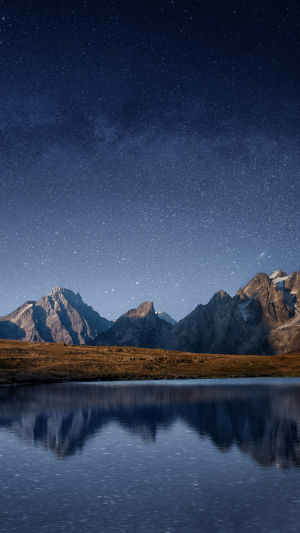
In the vast realm of photography, capturing the beauty of the night sky has always fascinated both amateurs and professionals alike. \
Among the myriad celestial wonders, photographing galaxies stands out as a profound challenge that requires meticulous planning, technical expertise, and a dash of creativity.
Step 1: Location Scouting
The foundation of a successful galaxy shoot begins with location scouting. Finding a suitable spot with minimal light pollution and a clear view of the night sky is crucial. Online resources and apps such as Dark Sky Finder or Light Pollution Map can assist photographers in identifying areas with optimal conditions for capturing galaxies in all their glory.
Step 2: Timing and Weather Conditions
Timing is key when it comes to photographing galaxies. It is essential to plan shoots during new moon or crescent moon phases to minimize interference from moonlight. Checking weather forecasts for clear skies, low humidity, and stable atmospheric conditions is equally important. Patience and flexibility are virtues, as waiting for the right conditions may be necessary.
Step 3: Equipment Preparation
To capture galaxies in intricate detail, a combination of specialized equipment is required. A digital single-lens reflex (DSLR) or mirrorless camera with manual settings capability is ideal. Paired with a wide-angle lens with a low aperture (f/2.8 or lower) and a focal length suitable for astrophotography, photographers can achieve a wider field of view and maximize light-gathering capabilities. Tripods are indispensable for stabilizing the camera during long exposure shots.
Step 4: Camera Settings and Techniques
Mastering the camera settings and techniques plays a pivotal role in capturing stunning galaxy shots. Setting the camera to manual mode enables precise control over the aperture, shutter speed, and ISO. Using the widest aperture setting allows maximum light intake. Long exposure times, typically ranging from 15 to 30 seconds or more, help capture faint details. Adjusting the ISO sensitivity based on the available ambient light is essential to strike a balance between capturing details and reducing noise.
Step 5: Framing and Composition
Creating visually appealing compositions is a testament to an artist's creativity. While framing galaxies, consider incorporating elements like trees, mountains, or architectural structures to add scale and context. The rule of thirds can serve as a helpful guideline, positioning galaxies or interesting foreground elements at intersections to create balance and visual interest.
Step 6: Focusing and Image Stacking
Achieving precise focus is crucial for capturing the intricate details of galaxies. Utilizing manual focus and employing techniques such as live view magnification and focus peaking aids in achieving sharpness. For sharper results, photographers can consider capturing multiple shots of the same scene and later perform image stacking during post-processing to reduce noise and enhance details.
Step 7: Post-Processing
Post-processing is the final stage to bring out the best in galaxy photographs. Using software like Adobe Lightroom or Photoshop, photographers can fine-tune the exposure, adjust white balance, reduce noise, and enhance colors to create captivating images that reflect the grandeur of the galaxies. However, maintaining a balance between enhancement and preserving the authenticity of the original scene is key.
Complete Galaxy Shooting Planning is an intricate process that demands careful attention to detail, technical proficiency, and artistic vision. By scouting suitable locations, understanding optimal timing, preparing the right equipment, and employing effective camera settings and techniques, photographers can capture breathtaking images of galaxies. Post-processing techniques allow for refining and enhancing these images to showcase the mesmerizing beauty of the cosmos.


